
Step by step guide to installing auto-photo-upload
A step by step guide to getting auto-photo-upload up and running on a Raspberry Pi from scratch.

auto-photo-upload series
This blog is part of the auto-photo-upload series.
This is a step by step guide to installing the auto-photo-upload project on a Raspberry Pi. It should take approximately 30 minutes - 1 hour to completely setup depending on your experience.
For general information about the auto-photo-upload project, please read blog post Automatically uploading photos solution (auto-photo-upload)
Here is what I used for context, you may need to vary based on what you use:
- Host machine: Windows
- DSLR camera: Canon 4000D
- Raspberry Pi model: Zero 2W
- Raspberry Pi OS: Raspian 64-bit Lite
- Short Micro to Mini USB cable
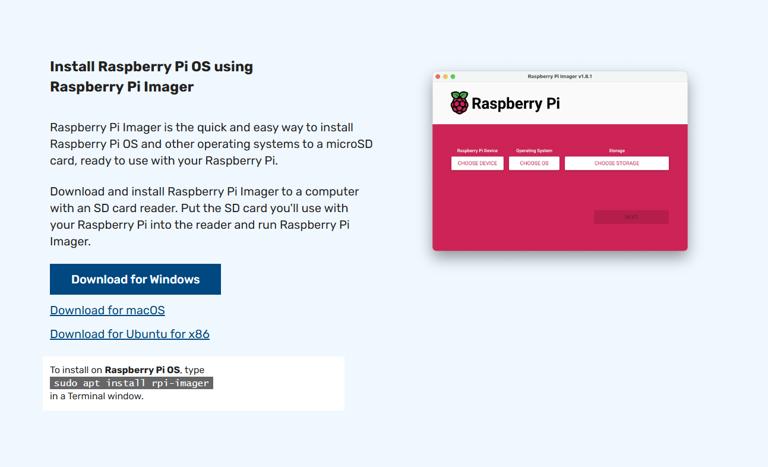
1. Download and install Raspberry Pi imager
This can be downloaded from https://www.raspberrypi.com/software/ Follow instructions to install on your PC.
 Installing Raspberry Pi Imager
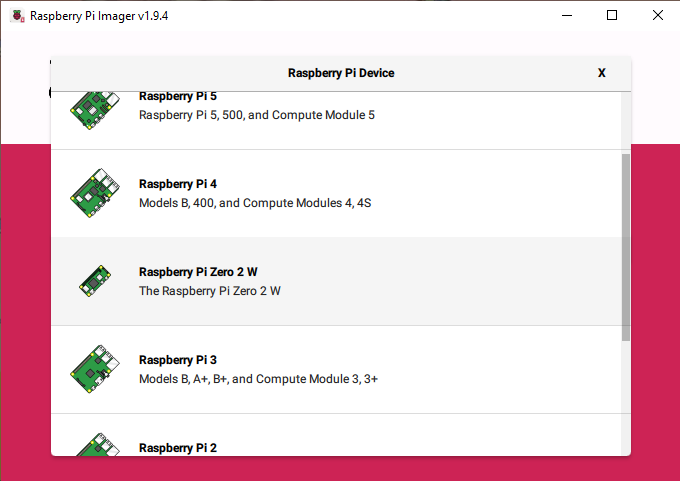
2. Installing Raspian on micro sd card
Start the Raspberry Pi imager.
For Raspberry Pi Device
Choose Raspberry Pi Zero 2 W
 Selecting Raspberry Pi Zero 2 W Device
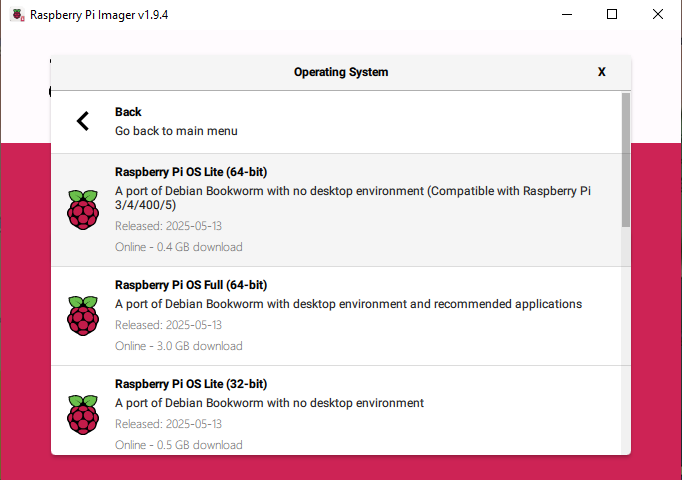
For Operating System
Choose Raspberry Pi OS (other) -> Raspian 64-bit Lite
 Selecting Raspberry Pi OS Lite (64-bit)
For Storage
Choose micro SD card that you want to use in Raspberry Pi.
After clicking Next, you will be asked about OS Customisation. I recommend setting up the following as a minimum, to make it easier to connect to your Raspberry Pi:
- General setting hostname as
auto-photo-upload.local - General setting a username and password
- General configuring the wireless LAN details.
- Services Enable SSH with
Use password authentication
Once you have been given confirmation that the write was successful, you can put the micro SD card in the Raspberry Pi and power it on.
 Write confirmation for SD card
3. Connecting to Raspberry Pi
If you haven't already, you should download PuTTY https://www.putty.org Open PuTTy, if you setup the Raspberry Pi with the recommended hostname, you can enter that as the Host Name and click Open at the bottom. Enter username and password the same as you entered in the Raspberry Pi Imager OS Customisation settings.
 Entering hostname in PuTTY
You should now be connected to your Raspberry Pi via SSH.
4. System updates
Run the following commands on your Raspberry Pi.
sudo apt-get update && sudo apt-get upgrade -y
sudo raspi-config
Go to -> Advanced Options -> Expand filesystem
 Expand filesystem option in raspi-config
sudo reboot
5. Download and install docker
# Add Docker's official GPG key:
sudo apt-get update
sudo apt-get install ca-certificates curl
sudo install -m 0755 -d /etc/apt/keyrings
sudo curl -fsSL https://download.docker.com/linux/debian/gpg -o /etc/apt/keyrings/docker.asc
sudo chmod a+r /etc/apt/keyrings/docker.asc

# Add the repository to Apt sources:
echo \
"deb [arch=$(dpkg --print-architecture) signed-by=/etc/apt/keyrings/docker.asc] https://download.docker.com/linux/debian \
$(. /etc/os-release && echo "$VERSION_CODENAME") stable" | \
sudo tee /etc/apt/sources.list.d/docker.list > /dev/null
sudo apt-get update

sudo apt-get install docker-ce docker-ce-cli containerd.io docker-buildx-plugin docker-compose-plugin
6. Download auto-photo-upload
The following command will download the source code to auto-photo-upload to a directory called auto-photo-upload-master.
curl -sL https://github.com/pixelliott/auto-photo-upload/archive/master.tar.gz | tar xz
7. Configure auto-photo-upload variables
cd auto-photo-upload-master
sudo nano Dockerfile
Fill in the variables denoted by the ##### Below is a quick description of each variable:
AUTO_PHOTO_UPLOAD_USERNAME - This is the email address that you use to sign in with on Pixelliott AUTO_PHOTO_UPLOAD_PASSWORD - This is the password that you use to sign in with on Pixelliott AUTO_PHOTO_UPLOAD_PROVIDER - This should be "Pixelliott" AUTO_PHOTO_UPLOAD_ALBUM_ID - (optional) The id of the album, if you have previously created AUTO_PHOTO_UPLOAD_ALBUM_NAME - Name of the album to which captured photos will be uploaded to AUTO_PHOTO_UPLOAD_ALBUM_VISIBLE - true / false - whether you want the newly created album to be visible or not AUTO_PHOTO_UPLOAD_ALBUM_VISIBLE_LOCATION - true / false - whether you want the newly created album to have visible locations or not AUTO_PHOTO_UPLOAD_PHOTO_VISIBLE - true / false - whether you want the newly created photos to be visible or not AUTO_PHOTO_UPLOAD_PHOTO_VISIBLE_LOCATION - true / false - whether you want the newly created photos to have visible locations or not
8. Build Docker image
sudo docker build -t auto-photo-upload-image .
9. Run Docker image
The below command will create a container and run it using the above docker image. It's set to always be running and will start automatically on boot in the future.
sudo docker run -it -d --restart always --name auto-photo-upload --privileged -v /dev:/dev auto-photo-upload-image
10. Debugging
If you want to see what's happening within your Docker image, you can run the below command:
sudo docker attach auto-photo-upload
The script tries to connect to your camera, if it's unable to, it will try again every 10 seconds. You might see some logs that look like the below, when it's unable to connect.
 auto-photo-upload logs detailing camera connectivity
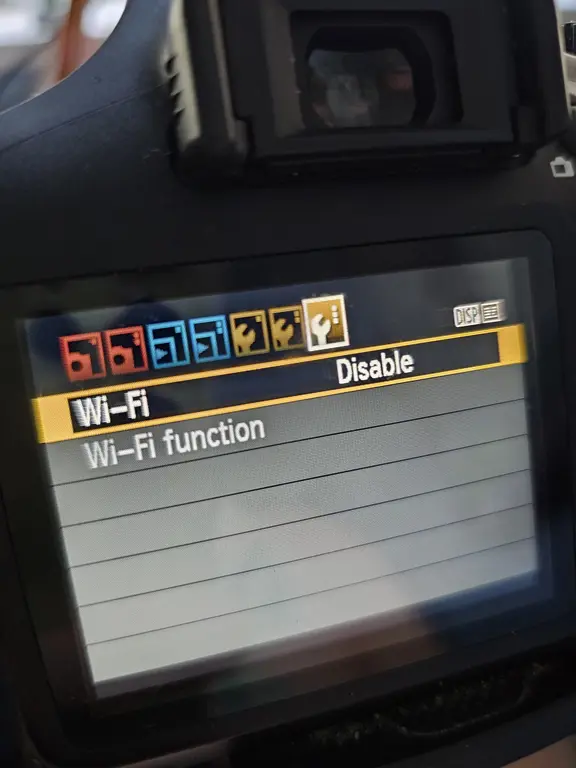
For my Canon 4000D DSLR camera, I had to disable the Wi-Fi functionality so that it would then connect through USB.
 Disabling Wi-Fi on Camera 4000D DSLR